 |
| Rosemary read to start class |
On 9th October, thanks to the generosity of my best friend Rosemary, I had the good fortune to attend a workshop with well known Adelaide watercolour artist Alan Louis Ramachandran. Alan is a skilled artist who paints with a very loose style. As I paint with a rather detailed style and take forever to finish a painting I knew I was in for some challenges. I packed my trusty Brauer Nervatona Calm tablets into my handbag, tucked my watercolour paints, brushes and assorted other paraphanalia under my arm, bade Ron farewell and headed out the door.
 | ||
| Ursula realizing she forgot her paints |
I'd like to say we both rocked up bright eyed and bushy tailed eager, alert and ready to learn. Alas my friend Rosemary was in awful pain and I was still absolutely worn out and aching from manning the Port Festival Booth the day before, nevertheless, we grabbed some coffee on the way, popped a few pain killers and rocked up ready to be enlightened.
Our fellow students were a mixed group consisting of some experienced watercolour artists and some absolute beginners. My friend Ursula, who does some watercolour classes with me was also there along with a few other members of Port Community Arts Centre. We weren't the only ones not starting the day off well as Ursula had left her paints behind ( personally, I blame the planetary influences for those sorts of mornings). Everyone was a bit nervous but eventually we all settled down, made some coffee and got organised.
Alan is very entertaining and fun in his teaching style, but he is also very full on - there is no time to sit and stare into space. His style is to do lots of preliminary preparation but when it actually comes the time to paint, everything happens quick and fast. In this blog I intend to give an outline of everything we did. I tend to be someone who decides to paint something and I just do it without preparation of any sort. It was interesting to me to see how much time Alan spends planning before he actually starts to paint.
 | |
| Alan Louis Ramachandran and the photo we were to paint. |
For the purposes of the demonstration I should point out that the colours used were not the important thing, and that we concentrating more on the tonal values of the lights and darks and on brush stroke techniques. Alan was using about 3 colours he had left on his palette but suggested that we could use Ultramarine and Burnt Sienna and a yellow of some sort.
Alan said he usually divided his preparation into about 5 steps and this is what I can remember about them.
 | |
| Alan's Step 1 drawing |
Step 1. The first step was to study the photo and define the main shapes within the image. In order to do this he asked us to draw a small 10cm x 6cm rectangle and then inside that to sketch the outline of the main shapes. Doing this helps to simplify the subject. He recommended dividing the rectangle into thirds. We were advised to look at the photo and take note of any connecting lines and to draw them in exactly as we saw them.
Step 2. Alan recommended that using a view scope was a good aid to design and composition. The next step was to look critically at the composition of the drawing we had done and do a second small drawing, adjusting the composition of the picture to make it more aesthetically pleasing and to help concentrate attention to the focal point of the piece. Of course you have to decide what is your focal point and try and make lines that lead the eye towards it. He recommended keeping the elements you like and removing or leaving out the ones that you don't. He said that in a gallery most paintings are first viewed from about 10 metres away and that from that distance it is the composition of the picture (the location of the main shapes and also the colour) that are the important things that will catch a viewer's eye and make them want to come nearer for a closer look. Diagonal lines help to give movement. He said that in order to get good composition it is OK to leave out a tree if it is in the wrong spot , make hill slopes more diagonal, etc.
Step 3. Deciding on tonal values. Once the composition was correct the picture was again re-drawn and we were asked to look closely at the photo and decide what areas were light and dark. He suggested that we shade in the different tones with our pencils and use a scale from 1 to 5, with 1 being the lightest tone and 5 the darkest tone.
 | |
| Alan's preparation sketches - note the 5 steps bit of details. |
Step 4. Next Alan suggested concentrating on the details of the picture. He recommended that we draw in finer detail certain sections of the photo. He said to practice drawing various components, especially the difficult ones, to ensure that when we eventually paint them that we paint them accurately. Most of a watercolour painting is drawn with a brush. He advised us to get the feel of the strokes we would be using to paint the picture. Apparently, the more you study and draw and get the feel of the picture, the better the painting will be and the more of your "emotion" that you will be able to put into it.
Step 5. Colour - warm, cold, high and low key. In this step one would normally look at the colours in the photo and then to decide on the colours to use. For this workshop we did not dwell too much on this aspect due to time constraints, but we were advised to do another quick drawing and insert written indications as to what were warm (W) and cold (C) areas. High key colours are those that would be like a bright sunny day, low key would be a dark stormy day. I made a mental note (again) to look into hot and cold colours etc (I keep forgetting to do this but I know one day I will figure it out!).
Once all these steps had been completed it was time to draw the picture ready to paint. Alan recommended that all of the small sketches you do should always be kept alongside you when you paint, so that they can be readily referred to.
 | |
| Masking tape covering the areas to be left white. |
With amazing speed he proceeded to quickly draw the large pencil sketch (that would have taken me ages to draw) and then, instead of using masking fluid, he showed us how to simply use some masking tape to create patches of light on a brick wall. He just tore off small uneven strips and stuck them on to the paper.
Alan does not normally stretch his paper or stick it to a board with tape, as he did for the demo. Normally, because he paints loose and wet, he said that he just wets the back of the paper and sits it on his easel (where it apparently obediently stays while he paints).
 |
| Alan's brushes and palette |
Although he has a good selection of brushes, he only used about 3 or 4 for this painting. One was a largish round mop brush, one a medium size round brush with a good point, he also had a lovely rigger brush (got to get one of those!) and a small daggy old house painting brush.
I was amazed at how roughly he treated his brushes during the painting process and was surprised that they didn't fall apart or shed bits of hair everywhere like mine would have (of course most of mine are all mont-marte cheapies which could have something to do with it ).
 |
| The first washes go on |
Once it was time to paint Alan referred to his tonal sketches and proceeded to put down some very light washes for the areas that had a tonal value of 1 and 2. It seems this is known as under painting.
In areas like the sky where he wanted a bit of white cloud, he wet the paper more first before applying the coloured wash.
 |
| Now some red tones |

He started out with the blue sky, then some green and lastly the reddish tones.
Apparently it doesn't matter how much paint runs and drips, you just catch bits of it and blend it all in or swish it around a bit. He made that look easy but I suspect it takes a bit of skill to know just how and where to spread your colours!
Once the lighter washes were completed Alan then started putting in the next level of tonal value, gradually darkening and blending colours in different areas of the picture.

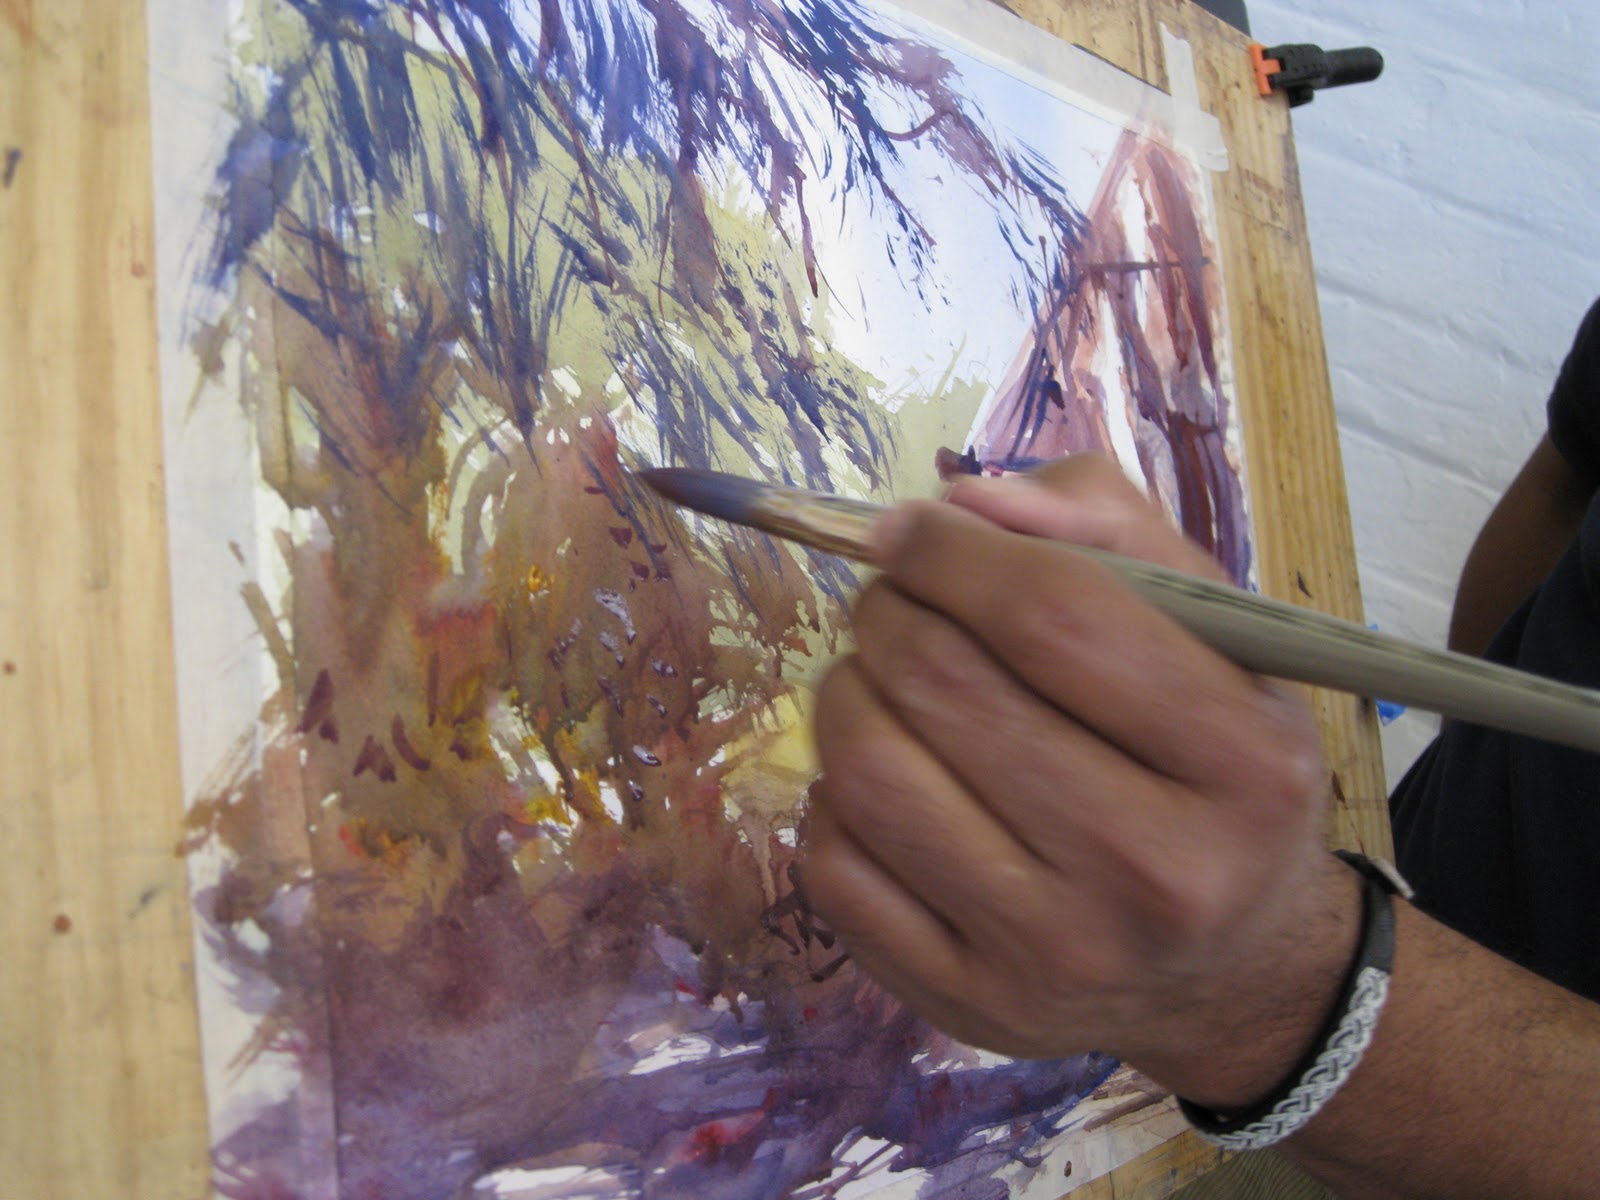
Next came some foliage colours deftly added using some quick broad strokes with the mop brush (apparently it's all in the wrist action!)
 |
| It's all in the wrist action! |

Then a few more darker tones were slapped and sloshed onto the buildings and ground at breakneck speed while we all just watched on awed and entertained.
 |
| Captive audience look on in awe |
 | |
| You gotta love that poor abused brush....! |
Next Alan started to fill in the darker areas. He had a way of grinding and mashing the mop brush down into the paint until the hairs split into clumps and flared out into multiple points, which he then dragged over the paper, creating multiple lines. Some touches of yellow highlights were also added in the centre.


Next he proceeded to draw the branches of the tree and the leaves. He had a way of twisting the brush as he drew the curving lines of the branches, which resulted in a variation in the line's thickness. It was very effective.
Ooh and I forgot to mention - LOAD YOU BRUSH! What he means by that is don't be a cheapskate like me and use a tiny bit of paint - mix up a generous amount and fill up the brush so that you can paint good strong lines and not run out of paint half way along the line.
The leaves were done by squishing that poor brush into the paint again to get multiple points with which to paint (I couldn't get any of my brushes to do the same thing no matter how I tried!).
 | |
| The rigger brush and that wrist in action again = instant tree branches in no time flat! |


 |
| Brush strokes used to create some leaves by splitting the hair of the brush |


 |
| White spaces where masking tape had been |
Next it was time to remove the blue masking tape, which had created the areas of light on the wall and on the pile of bricks. Note how thick and dark the paint has been applied in some areas particularly in the foreground.
 |
| Adding in dark details with your loaded brush |
After the leaves and branches were complete and lots more of the shadows had been drawn in, some of the finer details were quickly painted in using single deft strokes with the pointed brush.
When it was time to paint the areas which were 5 in tonal value Alan stressed the need to make sure you used plenty of paint. He said that it was very important not to have the mix too watery or it would not be dark enough when it dried out.
He then showed us how to put on some thick paint and take some of it off again with a metal scraper, in order to create an interesting pattern (which in this instance was on the wall, but which I thought would be great if you were painting leaves on the ground). You can use your fingernail or a credit card to do this too.
 |
| The nifty little metal scraper that Alan uses |
 |
| Marks left by scraper - note how thick the paint was first |
A few more finishing touches to a few leaves and shadows, a very faint glaze over some of the white areas on the wall, taa daaah - it was finished (all in record time).
 |
| Just a couple more leaves here and there |
 |
| Faint glazing has been applied to the white patches on wall |
 |
| The Finished Painting |
Then it was our turn.....
I have realized I will probably never be a loose painter (oh the stress of it all) as the time in which we had to work was way to short for a control freak like me. All that trying to keep putting the paint on and blending it on the paper before it runs off or before the paper dries out or whatever. It wasn't until I actually stopped stressing and thought "oh to heck with it" and started just slapping paint on that I actually made any progress (I still say I didn't have good enough brushes hem hem - that's my excuse and I'm sticking to it). There are some advantages to that style of painting though - you can accidentally drip paint onto the paper and it is really not going to be noticed, unless its a little dark blob in the middle of the blue sky (then you apparently turn it into a bird!)
 |
| Look at us all lined up pensively waiting to be assessed |
Alan called time to stop before any of us were ready of course (which was just as well because we were all starting to get to fiddley with it).
We all lined up obediently (from about 10 metres) while Alan went through and constructively assessed our efforts, pointing out those areas that were good and those that needed a little attention.
Overall, I think he was pleased with our efforts, particulary those done by some of the beginners. Unfortunately (for my stress levels) he chose mine to be the first to critique (eek - panic attack). I needn't have worried - he thought I had done OK. (wheeww, relief!).
Anyway, shown below is what the class produced. It is interesting and amazing how different they all are - no two are the same even though we all had the same excellent instruction, we all created our own individual paintings with our own "emotional" input. My effort is the one shown with Alan in the photo directly below.
 |
| Alan reviewing my painting (which definitely looks better from a distance - close up not so good!) and looking like he's praying I get better! |


All in all, it was a great workshop which I thoroughly enjoyed (got to start saving so I can do his classes). I've probably forgotten a million tips I should have included, but I hope you have found some of what I remembered interesting. Thanks again Rosemary and thanks too to Alan for a really great workshop.
 |
| What a talented and artistic bunch we all turned out to be eh! Everyone with their paintings. Alan's painting is on the wall. He is holding mine. |
If anyone would like to view Alan's art go to:
http://alanlouisartist.wordpress.com/
If you live in Adelaide and would like to attend his classes and learns lots of great watercolour stuff, his email is:
thedesignerstouch@yahoo.com.sg
Cheers all.
Heather.
Quite interesting, Heather, thanks for showing such detail about his class and the paintings by those in attendance. I like yours!!
ReplyDeleteWow. Sounds *and* looks like a fantastic workshop! Thanks so much for sharing it with us. And Alan's work is lovely!
ReplyDeleteHi Heather - It sounds like you enjoyed the workshop and I liked your painting. I did notice that you are not in any of the group photos!!!!!
ReplyDelete- Dianna
Thanks all for your kind remarks. No Di - I was holding the little camera all the time.
ReplyDelete